Introduction
Drupal is one of the greatest free and open-source content management systems that used to make many of the websites you see every day. Easy content authoring, excellent security, and reliable performance are some of the most important benefits of using Drupal, but the most important feature of Drupal that sets it apart from other CMS is the flexibility and modularity which is one of the core principals of it. It’s also a great choice for creating integrated digital frameworks. You can extend it to anyone, or many, of thousands of add-ons. Modules expand Drupal’s functionality.
We are assuming that you have root permission, otherwise, you may start commands with “sudo”.
Requirments
For install and using Drupal, you need the following things:
- A web server like Apache or Nginx
- A database like Mysql (MariaDB)
- PHP 5.5 or Higher
We are going to Install Apache as our web server, MariaDB as our Database and PHP 7.
Install Apache
You can easily install Apache from the official repository with the command below:
yum install httpdAfter installation execute the following commands to start your Apache service and make it run at startup;
systemctl start httpdsystemctl enable httpd
Install MariaDB
MariaDB 5.5 is provided by the official RHEL repository and you can install it easily and it’s fine with Drupal (tested out) but it’s not the latest version if you want to install the latest version you need to add the official MariaDB repository first.
Install MariaDB 5.5
As told you can easily install it with the following command:
yum install mariadb-serverStart and Enable the MariaDB service:
systemctl start mariadbsystemctl enable mariadb
Install MariaDB 10.2 (Latest)
At the time of the writing, 10.2 is the latest stable version of MariaDB.
For adding the MariaDB official repository create a file called “mariadb.repo” with the command below:
nano /etc/yum.repos.d/mariadb.repoAnd paste the following configuration in it, then save and exit:
# MariaDB 10.2 CentOS repository list - created 2017-09-23 08:48 UTC
# http://downloads.mariadb.org/mariadb/repositories/
[mariadb]
name = MariaDB
baseurl = http://yum.mariadb.org/10.2/centos7-amd64
gpgkey=https://yum.mariadb.org/RPM-GPG-KEY-MariaDB
gpgcheck=1
Now you can install MariaDB 10.2 with the following command:
yum install mariadb-serverAnd after the installation, don’t forget to start and enable the service:
systemctl start mariadbsystemctl enable mariadb
Install PHP 7
PHP 7 is not provided by the official repository, but you can install is from “Webtatic”.
For adding “Webtatic” repo you need to install “EPEL” first:
yum install epel-releaseThen you can execute the following command to add the Webtatic repository as well:
rpm -Uvh https://mirror.webtatic.com/yum/el7/webtatic-release.rpmNow you can install PHP 7 and the needed extensions with the following command:
yum install php70w php70w-curl php70w-gd php70w-pear php70w-mbstring php70w-xml php70w-phar php70w-json php70w-mysql php70w-opcacheCreating Database
First of all, we need to do some initial configuration for MariaDB.
Run the Mysql installer script with the following command:
mysql_secure_installationSet a password for the “root” user and answer all other question with “y”
Login to root user with the following command:
mysql -u root -pNow we can create our database with the command below (Make sure to replace the red parts with your preferred values):
create database HS;

grant all privileges on HS.* to 'username'@'localhost' identified by 'password';

flush privileges;
Download and install Drupal
Download the Drupal source from its official website in your document root:
cd /var/wwwwget https://ftp.drupal.org/files/projects/drupal-8.3.7.tar.gz
Extract the file:
tar xvzf drupal-8.3.7.tar.gzSwitch to Drupal source directory:
cd drupal-8.3.7Move everything to the correct document root:
mv ./* /var/www/htmlYou have to set “Apache” as the owner of the Drupal Files with the following command:
chown -R apache:apache /var/www/htmlNow you can open your browser and enter your server Domain name or IP address to see the following page:
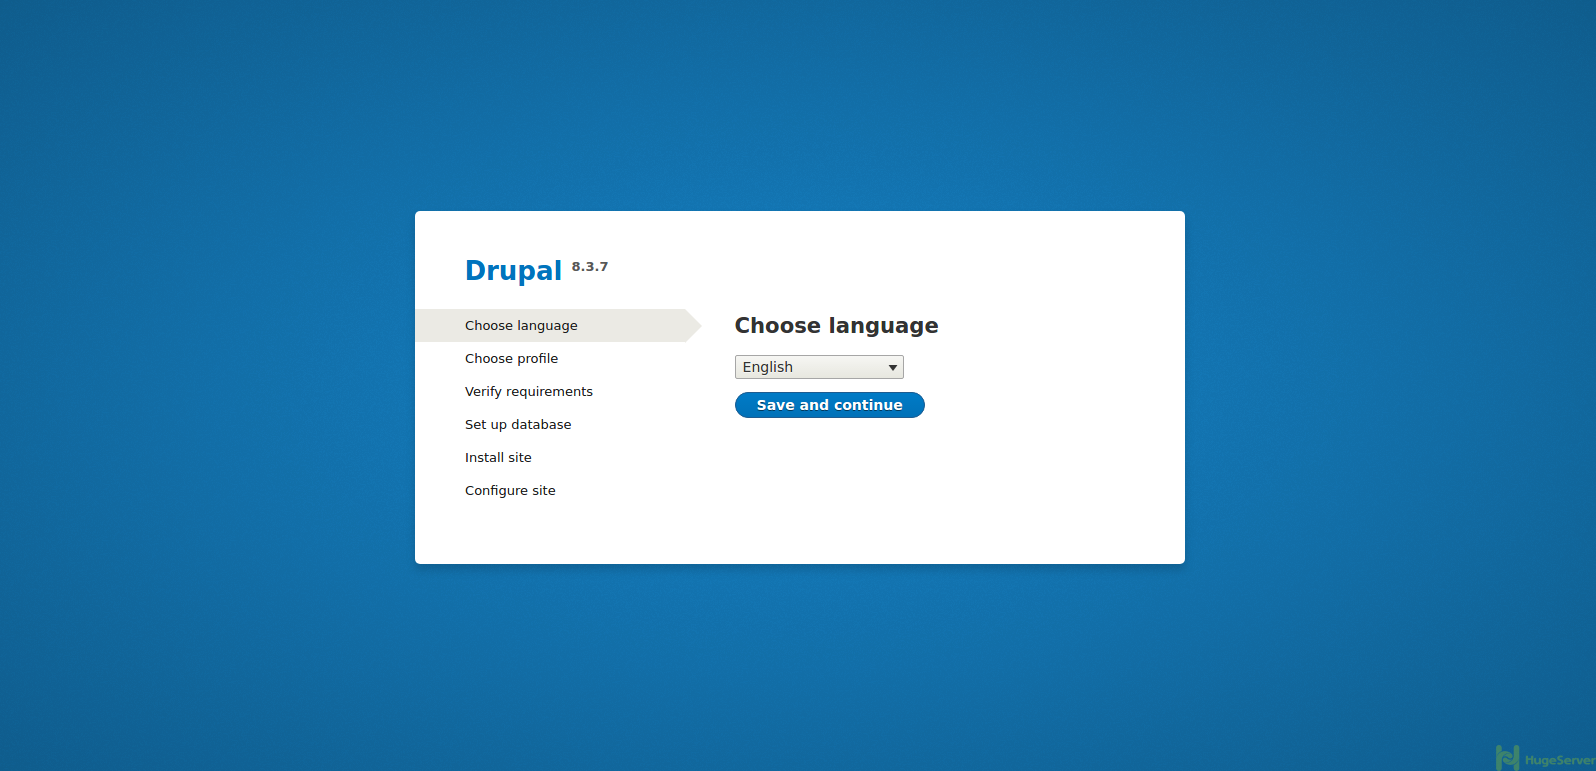
You can go ahead and install Drupal easily through the wizard.
For more information and news you can check out Drupal official website!
Hi. I done all how you describe in this manual. But when I enter http://localhost/drupal
It wright “Drupal was not found in this server”
How can I solve this problem?
Hello Denis,
You don’t need to add “/drupal” at the end of your address, just type: “http://localhost”
Thanks
Hey man big thanks for the walkthrough. It got this total centOS newbie 99% of the way there. Just had to pop holes for port 80 and 443 in the server’s local firewall using “sudo firewall-cmd –permanent –add-port=80/tcp” now I am on my way!
Oh, I forgot I also had to install wget as well, but that is just met getting tripped up as a 100% absolute newb. Thanks again!
This is a non complicated writeup and followed it to the letter.
some additional info tho. thought it would help fellow noob and save from googling. 🙂
1. on a fresh installed system, make sure you have mod_rewrite set.
this site has a clear and concise steps on how to do it: https://arjunphp.com/enable-configure-mod_rewrite-apache-centos-7/
2. the sequence of moving the drupal files below will leave the hidden file .htaccess and can cause issues (it did to me):
# cd drupal-8.3.7
# mv ./* /var/www/html
/etc/httpd/conf/httpd.conf
I just moved the extracted drupal folder under html then renamed it to my sitename, which is the way i want (e.g. http://localhost/mysitename/)
3. If you have Selinux enabled, add the following to it:
chcon -R -t httpd_sys_content_rw_t /var/www/html/
or
chcon -R -t httpd_sys_content_rw_t /var/www/html/
ignore /etc/httpd/conf/httpd.conf on item 2.
on step 3
or
chcon -R -t httpd_sys_content_rw_t /var/www/html/yoursitenamehere