Introduction
Moodle is an open-source Learning Managment System (LMS) and it has become one of the most popular LMSs among educators around the world as a tool for creating single robust, secure and integrated system that can help you create personalized learning environments and online courses as a dynamic website. to work, it needs to be installed on a server or a web hosting service.
Moodle is built by the Moodle project which is led and coordinated by Moodle HQ, which is financially supported by a network of over 80 Moodle Partner service companies worldwide.
![]()
Requirments
In this tutorial, we are going to install PHP 7 which is not provided by the official RHEL repository so we need to add “Webtatic” repository in order to get access to PHP 7.
First, we need to install EPEL repo:
yum install epel-releaseNow you can add Webtatic with the following command:
rpm -Uvh https://mirror.webtatic.com/yum/el7/webtatic-release.rpmInstall PHP 7.0
You can easily install PHP 7 and the needed dependencies with the command below:
yum install php70w php70w-curl php70w-gd php70w-intl php70w-ldap php70w-mysql php70w-pspell php70w-xml php70w-xmlrpc php70w-zip php70w-common php70w-opcache php70w-mbstring php70w-soapInstall Apache
Obviously, in order to serve our Moodle, we need a web server. we are going to install Apache as our web server:
yum install httpdAfter the installation process is finished, you have to start and enable the Apache service with following commands:
systemctl enable httpdsystemctl start httpd
for setting the correct DocumentRoot, open your Apache configuration file with the command below:
nano /etc/httpd/conf/httpd.confFind the line that refers to “DocumentRoot” and change it like below:
DocumentRoot "/var/www/html/moodle/"Then restart Apache service to take effect:
systemctl restart httpdInstall and configure MariaDB
Execute the following command to install MariaDB and its service:
yum install mariadb-serverStart and enable the service:
systemctl start mariadbsystemctl enable mariadb
Configure MariaDB
In order to get your MariaDB to be compatible with Moodle, you need to enable “InnoDB” engine.
Open MariaDB configuration file with your text editor:
nano /etc/my.cnf.d/server.cnfAdd the following lines at the very end of the file:
[client]
default-character-set = utf8mb4

[mysqld]
innodb_file_format = Barracuda
innodb_file_per_table = 1
innodb_large_prefix

character-set-server = utf8mb4
collation-server = utf8mb4_unicode_ci
skip-character-set-client-handshake

[mysql]
default-character-set = utf8mb4
Then save and exit.
Restart MariaDB service to take effect:
systemctl restart mariadbCreate Database and User for Moodle
In this section, we are going to create a Database for Moodle and a user who have the privileges.
Log in to your MariaDB as root user with the following command:
mysql -u root -pIssue the following command to create a database (replace the red parts with your own values):
> create database moodle;Create a user with full privileges on Moodle database:
> grant all privileges on moodle.* to 'admin'@'localhost' identified by 'password';It’s done, you can log out with the following command:
> quitDownload and install Moodle
You can download the latest stable version of Moodle with the following command:
wget https://download.moodle.org/stable34/moodle-latest-34.tgzExecute the following command to extract the files to the correct path:
tar xvzf moodle-latest-34.tgz -C /var/www/html/Set Apache as the owner of the whole DocumentRoot:
chown -R apache:apache /var/www/Installing Moodle
Now you have to open your browser and enter your Domain or your Public IP Address, you should see a page like below:
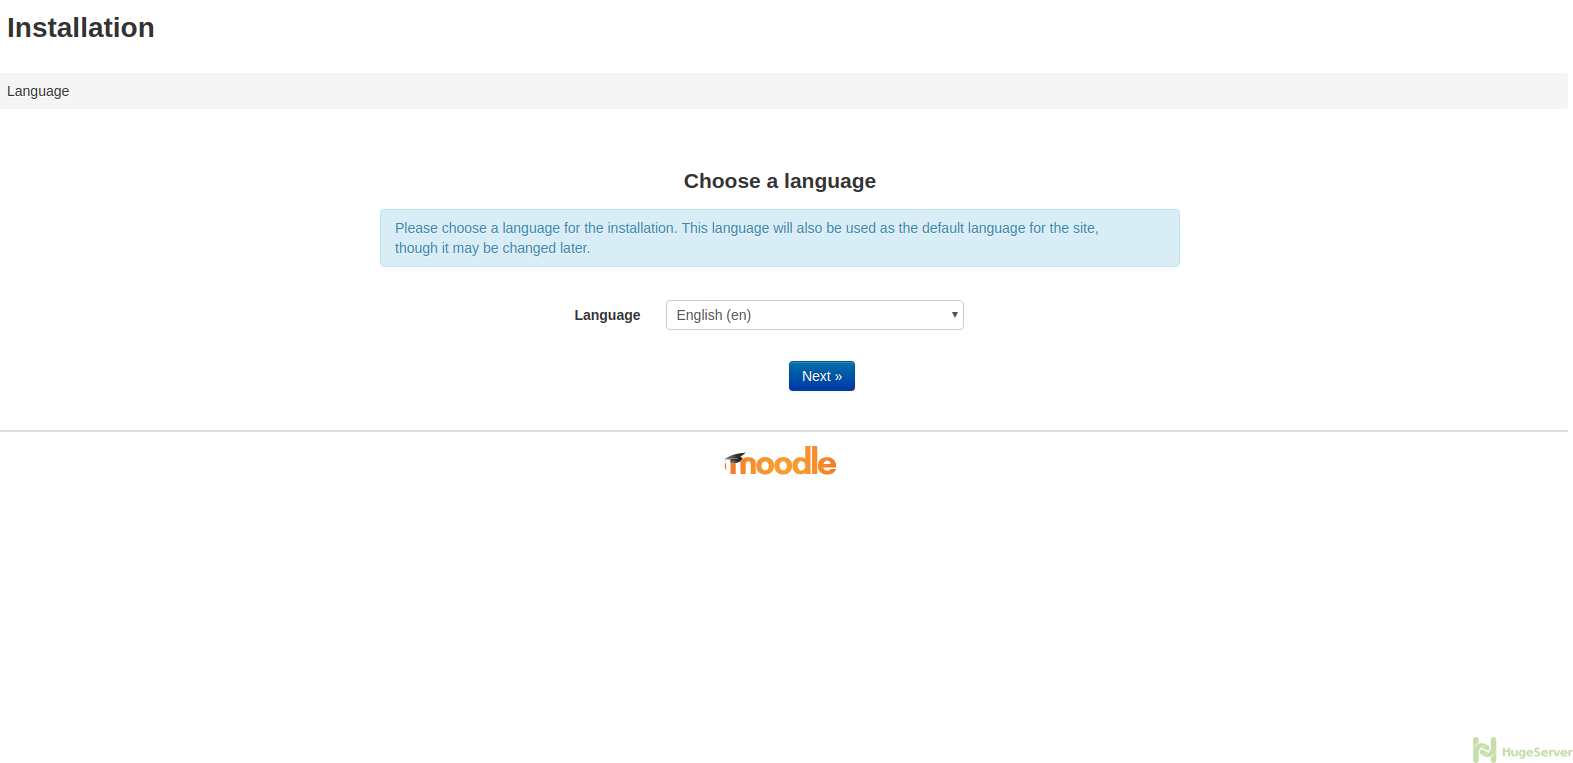
Choose your language and hit next to proceed.
Hit next button on the next page as well to proceed to the following page:
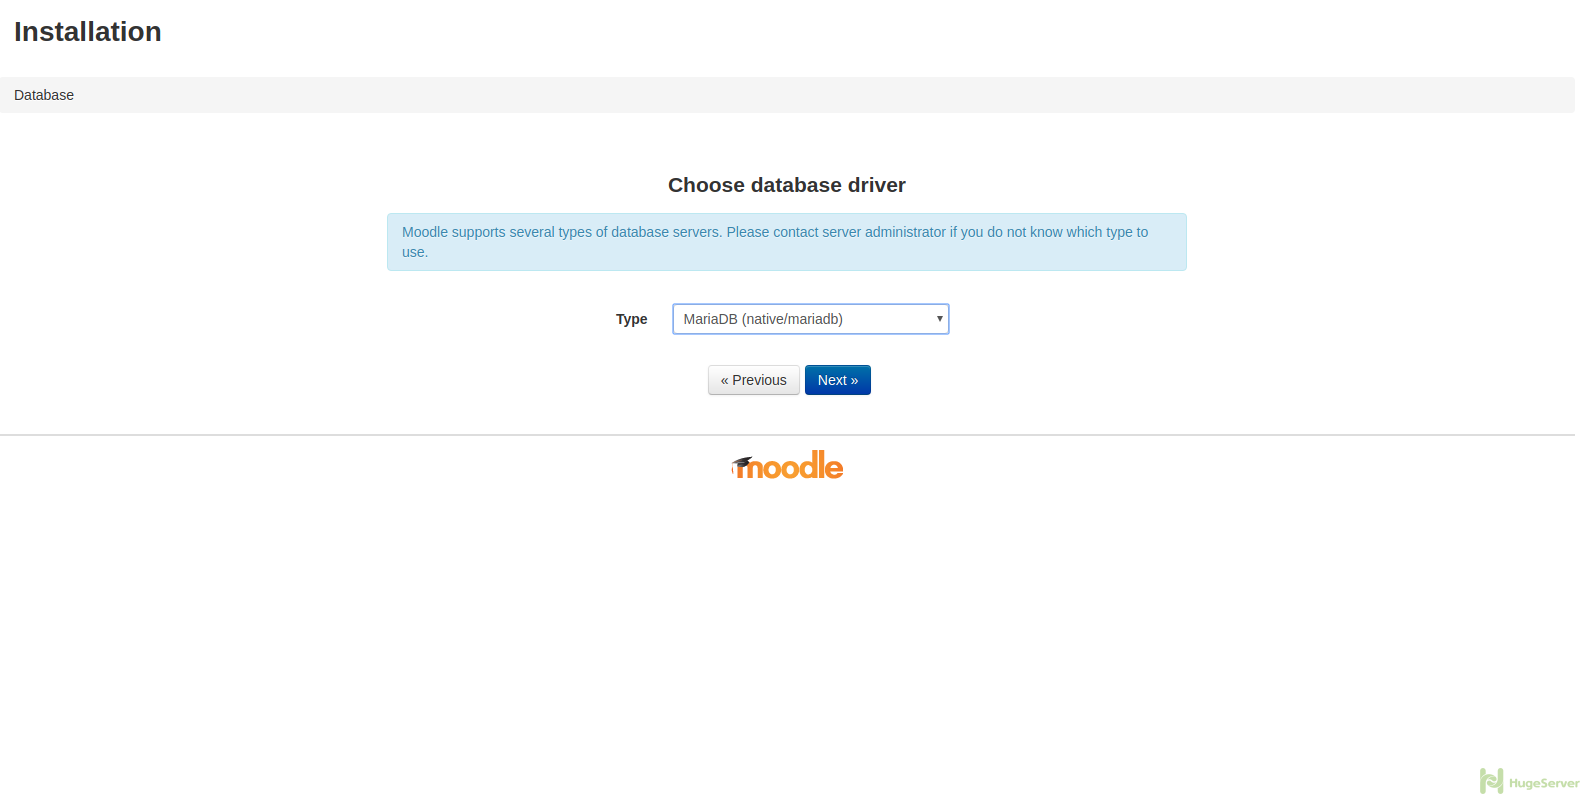
Make sure to choose “MariaDB” as the type, then hit “Next” to proceed.
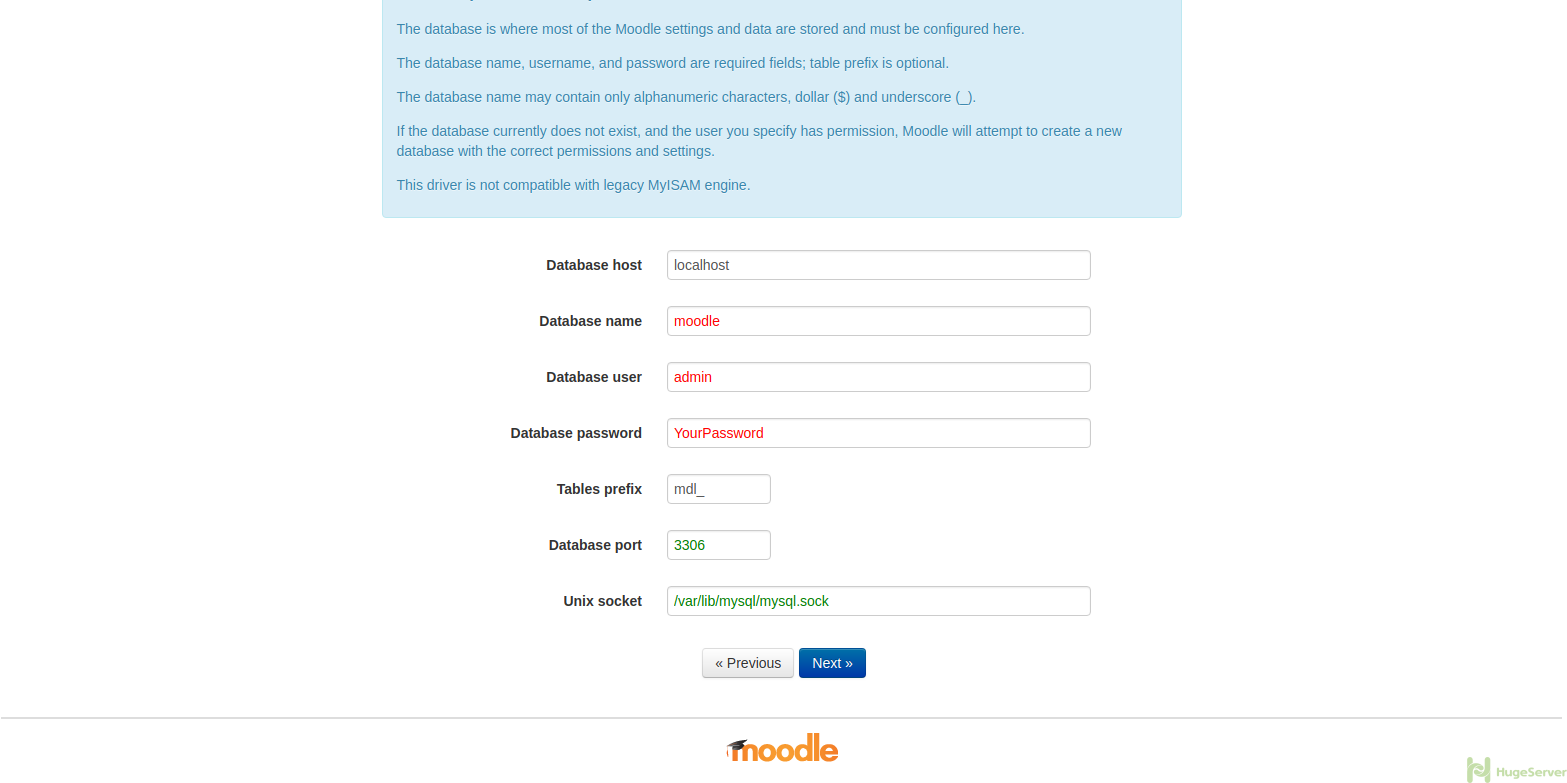
On the following page, you need to enter some information, make sure to replace the red part with your own values and the green parts exactly like the picture:
It’s done you can proceed with the installation process it could take a few seconds.
For more information and news you can visit Moodle official website!
You need to add some firewall rules in order to access Moodle via web browser. The rules are:
firewall-cmd –permanent –zone=public –add-service=http
firewall-cmd –permanent –zone=public –add-service=https
firewall-cmd –reload
I followed all instructions but got an error during moodle installation the error is ” Parent Directory (/var/www/html) is not writable. Data Directory (/var/www/html/moodledata)cannot be created by installer”
I error is “Data Directory (/var/www/html/moodledata)cannot be created by installer”
Just move out the moodledata to somewhere else. like
mkdir /moodledata
chown -R apache:apache /moodledata
Because it call the folder /var can be expose from internet and not accept to start the Installation