LAMP stack is a popular web platform commonly used to run websites and servers. (Linux,Apache,MySQL,PHP)
The LAMP Softwares are completely replaceable with other similar Softwares, and it’s not limited to the original bundle.
as a web stack, LAMP is suitable for building dynamic websites and web applications
We are assuming that you have root permission, otherwise, you may start commands with “sudo”.
Before You Begin
You have to update your repositories cache to get the latest versions. type:
apt‐get updateInstall and configure Apache
Install apache 2.4:
apt-get install apache2You can change the configurations using a text editor (we are using nano)
nano /etc/apache2/apache2.confAnd after changing the configurations you should restart apache2:
systemctl restart apache2Install MySQL
For installing MySQL type:
apt‐get install mysql‐serverInput a secure password when prompted by the installation.
Run secure installation to remove the test database and any user permissions added during the installation.
mysql_secure_installationIt’s recommended to select yes (y) for all questions. if you already have a secure root password you don’t need to change it.
Setup MySQL Database
Now you can create a database and grant your users permissions.
Login to MySQL
mysql ‐u root ‐pFor creating a database and granting permissions to users you can use following commands: (you may change the values of “dbname”,”username”,”password” to your own values)
mysql> create database dbname;-> grant all on dbname.* to 'username' identified by 'password';!ATTENTION!
Don’t forget to put the username and password between ‘ ‘.
Exit MySQL
mysql> quitInstall PHP
In this section we have 2 options to install PHP5 or PHP7, the official repository of Debian 8 only provides PHP5, as you will see we have to add an unofficial repository in order to install PHP7
Install PHP 5
Install PHP5 and the PHP Extensions:
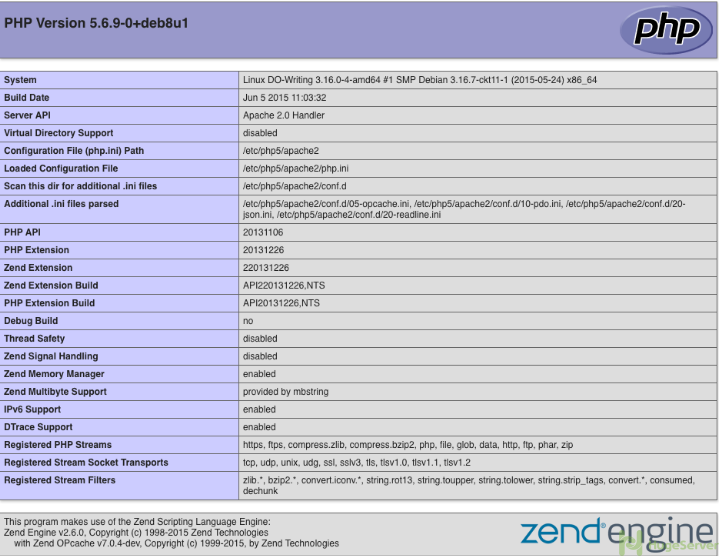
apt-get install php5-common libapache2-mod-php5 php5-cli service apache2 restartNow it’s time to test the PHP software that you just installed. move to your public web directory:
cd /var/www/htmlNow use your favorite text editor to create a file named info.php
nano info.phpInside that file, type the following line:
<?php phpinfo(); ?>You can use your Domain or Private IP address to see the following page:
If you need support for MySQL in PHP, then you should install the php5-mysql package:
apt-get install php5-mysqlRestart Apache:
systemctl restart apache2
Install PHP 7
In this tutorial, we are using Dotdeb repository.
Configure Dotdeb
Append the Dotdeb to the repository.
echo 'deb http://packages.dotdeb.org jessie all' >> /etc/apt/sources.listecho 'deb-src http://packages.dotdeb.org jessie all' >> /etc/apt/sources.list
Fetch and install the GnuPG key
cd /tmpwget https://www.dotdeb.org/dotdeb.gpgapt-key add dotdeb.gpgrm dotdeb.gpg
Update your “apt” to include new packages:
apt-get updateInstall PHP7
apt-get install php7.0And also the packages:
apt-get install php7.0 php7.0-fpm php7.0-gd php7.0-mysqlConfigure Apache2 to use PHP7
To enable PHP7.0 in Apache2 type:
a2enmod proxy_fcgi setenvifa2enconf php7.0-fpm
Restart Apache
systemctl restart apache2To test your configurations:
cd /var/www/html
Now use your favorite text editor to create a file named info.php
nano info.phpWrite the following text in it then save and exit:
<?php phpinfo(); ?>You can use your Domain or Private IP address to see the following page:
