Tag Archives: apache

How to install Apache 2.4 on CentOS 6 or 7

Today we are going to install the latest version of Apache “Apache 2.4.23” on a new fresh updated CentOS 7. You can use this tutorial for CentOS 6 as well.

Make sure you have already installed following packages on your server.

yum install gcc
yum install make
yum install openssl-devel
yum install apr-devel
yum install apr-util-devel
yum install wget

Then, we will choose the latest version from Apache website. and download it.

An update: If you are using this article on CentOS 7, the APR version on yum won’t work for you, and you should compile the apr, and apr-util from source, so please remove it from your server if you installed it via yum, and try following:

cd /usr/src
wget http://mirror.lax.hugeserver.com/apache/apr/apr-1.5.2.tar.gz
wget http://mirror.lax.hugeserver.com/apache/apr/apr-util-1.5.4.tar.gz
tar xvfz apr-1.5.2.tar.gz
tar xvfz apr-util-1.5.4.tar.gz

cd apr-1.5.2
./configure --bindir=/usr/bin/
make && make install

cd ../apr-util-1.5.4
./configure --bindir=/usr/bin/ --with-apr=/usr/bin/apr-1-config
make && make install

Now you are able to continue with the rest of guide.

http://httpd.apache.org/download.cgi#apache24

cd /usr/src
wget http://www-eu.apache.org/dist//httpd/httpd-2.4.23.tar.gz
tar xvfz httpd-2.4.23.tar.gz

Now we will start building Apache from source and install it on our server.

cd httpd-2.4.23
./configure --help

We have to know which module of apache we want to install and include them on the ./configure command. It is really easy, as you only need to know the module name and type it with “–enable-(module-name)”. For example, we want to install apache with SSL module, so we will type “–enable-ssl”

By default, Apache will install all its architecture-independent files in  “/usr/local/apache2”. If you want to change this directory we have to set the –prefix option in ./configure . I will use /etc/httpd/ for this option in this tutorial. But, make sure that you are not overwriting your old configuration if you already have installed apache before. I am also using “–sbindir” option to specify the directory where system administrator executables will be installed. Those are server programs like httpd, apachectl, suexec, etc. which are necessary to run the Apache HTTP Server.

mkdir /etc/httpd/

./configure --prefix=/etc/httpd/ --sbindir=/sbin/ --enable-ssl --enable-so
make
make install

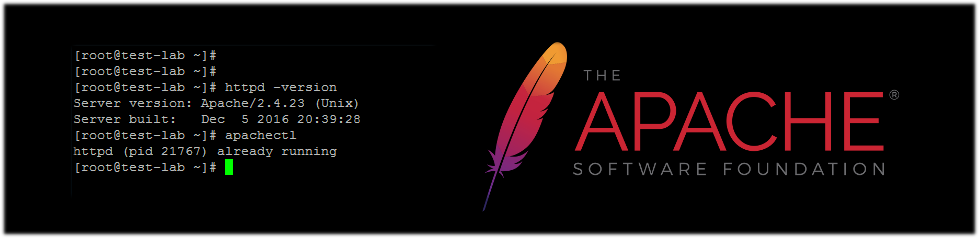
Now we are ready to go, we can start Apache server and go ahead with configurations.

apachectl start

That’s it! should you have any question or problem regarding this post please leave a comment below.

How to use IPv6 on Apache?

Nowadays IPv6 is getting more and more common to be used on web servers. It’s better to implement IPv6 on servers in order to be accessible on IPv6 networks.  Here it is a really quick instruction how to get ready for IPv6 on your Apache web servers.

I have installed a fresh CentOS and a fresh apache on my test server, without any control panel. If you are using a control panel or any other operation systems, the way of preparing should be the same, however, if you have any problem during your configuration, you can ask me in the comments.

Let’s start with the apache configuration file. Open “/etc/httpd/conf/httpd.conf” with your text editor in the server. I am using nano.

 nano /etc/httpd/conf/httpd.conf

Now add your IPv6 address to the “listen” options in the file. You should search for “listen” and edit or add the line with your own IPv6. For this tutorial I am using the private prefix “fd13:01ec:a560:534f::/64”

Listen [fd13:01ec:a560:534f::100]:80

Save and exit this file. Now we should change the virtual hosts to add a new IPv6 record into this.  Here is an example of a virtual host with IPv6.

<VirtualHost [fd13:01ec:a560:534f::100]:80 >
ServerName test-lab.hugeserver.com
ServerAlias test-lab.hugeserver.com
ServerAdmin test-lab@hugeserver.com
DocumentRoot /home/test-lab/public_html
<Directory /home/test-lab/public_html>
</Directory>
</VirtualHost>

You should change this configuration in order to be fit into your server configuration. What you actually can do, is copying the VirtualHost configuration of your IPv4 and edit the first line to IPv6. Do not forget to use brackets for your IPv6.

After configurations are done, we are going to restart apache and try to access our web server over IPv6 from Browser.

/etc/init.d/httpd restart

Now it’s accessible from browsers

http://[fd13:01ec:a560:534f::100]/

If you have any problem or question please leave a comment below.

How to Install Apache 2.2, PHP 5.6, MySQL 5.7 on CentOS 6

Today I am going to teach you the easiest way of installing a Webserver with Apache, PHP, and MySQL.

We are going to use Epel and Remi repositories on CentOS and configure our server. First of all, we should find the latest version of Epel and Remi packages from their sites :

http://dl.fedoraproject.org/pub/epel/6/x86_64/
http://rpms.famillecollet.com/enterprise/

After it, we will download the packages on our system and install them on the server.

wget http://dl.fedoraproject.org/pub/epel/6/x86_64/epel-release-6-8.noarch.rpm
wget http://rpms.famillecollet.com/enterprise/remi-release-6.rpm
rpm -Uvh remi-release-6.rpm epel-release-6-8.noarch.rpm

After these packages are installed completely, we should activate these repositories on Yum configuration file.

nano /etc/yum.repos.d/remi.repo

Make sure that “[remi]” and “[remi-php56]” are enabled. It should look like as following.

[remi]
name=Remi’s RPM repository for Enterprise Linux 6 – $basearch
#baseurl=http://rpms.remirepo.net/enterprise/6/remi/$basearch/
mirrorlist=http://rpms.remirepo.net/enterprise/6/remi/mirror
enabled=1
gpgcheck=1
gpgkey=file:///etc/pki/rpm-gpg/RPM-GPG-KEY-remi

[remi-php56]
name=Remi’s PHP 5.6 RPM repository for Enterprise Linux 6 – $basearch
#baseurl=http://rpms.remirepo.net/enterprise/6/php56/$basearch/
mirrorlist=http://rpms.remirepo.net/enterprise/6/php56/mirror
# NOTICE: common dependencies are in “remi-safe”
enabled=1
gpgcheck=1
gpgkey=file:///etc/pki/rpm-gpg/RPM-GPG-KEY-remi

We have to save the file and then edit the Epel repository to make sure it is enabled too.

nano /etc/yum.repos.d/epel.repo

It should be enabled as following :

[epel]
name=Extra Packages for Enterprise Linux 6 – $basearch
#baseurl=http://download.fedoraproject.org/pub/epel/6/$basearch
mirrorlist=https://mirrors.fedoraproject.org/metalink?repo=epel-6&arch=$basearch
failovermethod=priority
enabled=1
gpgcheck=1
gpgkey=file:///etc/pki/rpm-gpg/RPM-GPG-KEY-EPEL-6

Now we can start to install PHP, apache on our system.

yum clean all
yum update
yum install php php-mysql

After all these steps are done, we will install MySQL on our system.

wget http://dev.mysql.com/get/mysql57-community-release-el6-7.noarch.rpm
yum localinstall mysql57-community-release-el6-7.noarch.rpm
yum repolist enabled | grep “mysql.*-community.*”
yum install mysql-community-server

It is now fully installed, we will start all services and will confirm the installed versions.

service mysqld restart
mysql –version
service httpd restart
php -v
httpd -v

If you have any question, please add a comment and I will get you back.