Category Archives: Tutorials

How Solid State Drives (SSDs) effects your business

As you might know, a website should be fully equipped with many powerful features to turn a visitor into a returning visitor or even a potential customer. It should be user-friendly and offer a good looking interface to visitors. Also recently, being fully responsive for both Mobile and Desktop systems has been turning into a must. However, any of the above will not be taken into account if your website takes a lot of time to load and it will destroy all of your hard work that you have done to create your website.
The studies have shown us that over 60% of people abandon a website after waiting for “3” seconds for that site to load. That clears out the fact that your visitors are not patient, they will abandon your website and get what they want from other websites which they do not need to wait for it to load. So websites performance plays a very important role in getting new visitors and converts them into returning ones. This is where the SSD comes into play.
HDDs have been the primary storage for all of the systems for a long time now, As SSDs provides much higher speed compared to HDDs, The IT professionals named it as the “Best Performance Upgrade Ever”.
HDD is a technology that uses the magnetism to store data on a rotating platter. The floating R/W head regularly spin at 10000 RPM to read and write data, this means that the faster the rotating platter spins, the quicker HDD performs. SSDs (Solid State Drives) are not relying on moving parts. Instead, data is stored in Microchips, They are so much faster, more reliable and not depending on mechanical parts to fetch information.

It’s not just the Speed

SSDs are using less power compared to HDDs as they work only on the electronic level and as there are no mechanical parts, SSDs generates less noise.
SSDs access time is about 35-100 microseconds and it’s a ridiculously high performance compared to 5000-10000 microseconds of HDD. This will ultimately allow you to run programs quicker this performance boost will make users load programs from your server quickly.

Conclusion

Nothing can heal the negative impact that left by an unsatisfied visitor who abandoned your website after waiting for it to load.
We at HugeServer Networks, know that customers need powerful resources to deploy their website and web applications to achieve high performance at an efficient cost. SSDs are available for all our services including Dedicated and Virtual servers which ultimately results in more rapid load time and better performance.

How to enable iptables on CentOS 7

Once you install CentOS 7, you will understand there are many differences between CentOS 6 and 7, but however, some technical and people want to use old programs like “iptables” on CentOS 7. One of the programs which are not common on CentOS 7 is “iptables”. CentOS 7 comes with another firewall installed in it called “firewalld” which is known by any customer.

You are able to disable this new firewall and enable old known iptables on CentOS 7 again.  Here I will show you how to do this.

We have to stop and disable firewalld service.

[root@test-lab ~]# systemctl stop firewalld
[root@test-lab ~]# systemctl mask firewalld

Then we should install iptables again on CentOS 7.

yum install -y iptables iptables-services

Once it is done, we have to enable and start it

systemctl enable iptables
systemctl start iptables

Now you are able to use old known iptables on CentOS 7 again, however, firewalld will give you more ability and better firewall options if you want to go professional.

How to install Apache 2.4 on CentOS 6 or 7

Today we are going to install the latest version of Apache “Apache 2.4.23” on a new fresh updated CentOS 7. You can use this tutorial for CentOS 6 as well.

Make sure you have already installed following packages on your server.

yum install gcc
yum install make
yum install openssl-devel
yum install apr-devel
yum install apr-util-devel
yum install wget

Then, we will choose the latest version from Apache website. and download it.

An update: If you are using this article on CentOS 7, the APR version on yum won’t work for you, and you should compile the apr, and apr-util from source, so please remove it from your server if you installed it via yum, and try following:

cd /usr/src
wget http://mirror.lax.hugeserver.com/apache/apr/apr-1.5.2.tar.gz
wget http://mirror.lax.hugeserver.com/apache/apr/apr-util-1.5.4.tar.gz
tar xvfz apr-1.5.2.tar.gz
tar xvfz apr-util-1.5.4.tar.gz

cd apr-1.5.2
./configure --bindir=/usr/bin/
make && make install

cd ../apr-util-1.5.4
./configure --bindir=/usr/bin/ --with-apr=/usr/bin/apr-1-config
make && make install

Now you are able to continue with the rest of guide.

http://httpd.apache.org/download.cgi#apache24

cd /usr/src
wget http://www-eu.apache.org/dist//httpd/httpd-2.4.23.tar.gz
tar xvfz httpd-2.4.23.tar.gz

Now we will start building Apache from source and install it on our server.

cd httpd-2.4.23
./configure --help

We have to know which module of apache we want to install and include them on the ./configure command. It is really easy, as you only need to know the module name and type it with “–enable-(module-name)”. For example, we want to install apache with SSL module, so we will type “–enable-ssl”

By default, Apache will install all its architecture-independent files in  “/usr/local/apache2”. If you want to change this directory we have to set the –prefix option in ./configure . I will use /etc/httpd/ for this option in this tutorial. But, make sure that you are not overwriting your old configuration if you already have installed apache before. I am also using “–sbindir” option to specify the directory where system administrator executables will be installed. Those are server programs like httpd, apachectl, suexec, etc. which are necessary to run the Apache HTTP Server.

mkdir /etc/httpd/

./configure --prefix=/etc/httpd/ --sbindir=/sbin/ --enable-ssl --enable-so
make
make install

Now we are ready to go, we can start Apache server and go ahead with configurations.

apachectl start

That’s it! should you have any question or problem regarding this post please leave a comment below.

How to use IPv6 on Apache?

Nowadays IPv6 is getting more and more common to be used on web servers. It’s better to implement IPv6 on servers in order to be accessible on IPv6 networks.  Here it is a really quick instruction how to get ready for IPv6 on your Apache web servers.

I have installed a fresh CentOS and a fresh apache on my test server, without any control panel. If you are using a control panel or any other operation systems, the way of preparing should be the same, however, if you have any problem during your configuration, you can ask me in the comments.

Let’s start with the apache configuration file. Open “/etc/httpd/conf/httpd.conf” with your text editor in the server. I am using nano.

 nano /etc/httpd/conf/httpd.conf

Now add your IPv6 address to the “listen” options in the file. You should search for “listen” and edit or add the line with your own IPv6. For this tutorial I am using the private prefix “fd13:01ec:a560:534f::/64”

Listen [fd13:01ec:a560:534f::100]:80

Save and exit this file. Now we should change the virtual hosts to add a new IPv6 record into this.  Here is an example of a virtual host with IPv6.

<VirtualHost [fd13:01ec:a560:534f::100]:80 >
ServerName test-lab.hugeserver.com
ServerAlias test-lab.hugeserver.com
ServerAdmin test-lab@hugeserver.com
DocumentRoot /home/test-lab/public_html
<Directory /home/test-lab/public_html>
</Directory>
</VirtualHost>

You should change this configuration in order to be fit into your server configuration. What you actually can do, is copying the VirtualHost configuration of your IPv4 and edit the first line to IPv6. Do not forget to use brackets for your IPv6.

After configurations are done, we are going to restart apache and try to access our web server over IPv6 from Browser.

/etc/init.d/httpd restart

Now it’s accessible from browsers

http://[fd13:01ec:a560:534f::100]/

If you have any problem or question please leave a comment below.

How to Install Apache 2.2, PHP 5.6, MySQL 5.7 on CentOS 6

Today I am going to teach you the easiest way of installing a Webserver with Apache, PHP, and MySQL.

We are going to use Epel and Remi repositories on CentOS and configure our server. First of all, we should find the latest version of Epel and Remi packages from their sites :

http://dl.fedoraproject.org/pub/epel/6/x86_64/
http://rpms.famillecollet.com/enterprise/

After it, we will download the packages on our system and install them on the server.

wget http://dl.fedoraproject.org/pub/epel/6/x86_64/epel-release-6-8.noarch.rpm
wget http://rpms.famillecollet.com/enterprise/remi-release-6.rpm
rpm -Uvh remi-release-6.rpm epel-release-6-8.noarch.rpm

After these packages are installed completely, we should activate these repositories on Yum configuration file.

nano /etc/yum.repos.d/remi.repo

Make sure that “[remi]” and “[remi-php56]” are enabled. It should look like as following.

[remi]
name=Remi’s RPM repository for Enterprise Linux 6 – $basearch
#baseurl=http://rpms.remirepo.net/enterprise/6/remi/$basearch/
mirrorlist=http://rpms.remirepo.net/enterprise/6/remi/mirror
enabled=1
gpgcheck=1
gpgkey=file:///etc/pki/rpm-gpg/RPM-GPG-KEY-remi

[remi-php56]
name=Remi’s PHP 5.6 RPM repository for Enterprise Linux 6 – $basearch
#baseurl=http://rpms.remirepo.net/enterprise/6/php56/$basearch/
mirrorlist=http://rpms.remirepo.net/enterprise/6/php56/mirror
# NOTICE: common dependencies are in “remi-safe”
enabled=1
gpgcheck=1
gpgkey=file:///etc/pki/rpm-gpg/RPM-GPG-KEY-remi

We have to save the file and then edit the Epel repository to make sure it is enabled too.

nano /etc/yum.repos.d/epel.repo

It should be enabled as following :

[epel]
name=Extra Packages for Enterprise Linux 6 – $basearch
#baseurl=http://download.fedoraproject.org/pub/epel/6/$basearch
mirrorlist=https://mirrors.fedoraproject.org/metalink?repo=epel-6&arch=$basearch
failovermethod=priority
enabled=1
gpgcheck=1
gpgkey=file:///etc/pki/rpm-gpg/RPM-GPG-KEY-EPEL-6

Now we can start to install PHP, apache on our system.

yum clean all
yum update
yum install php php-mysql

After all these steps are done, we will install MySQL on our system.

wget http://dev.mysql.com/get/mysql57-community-release-el6-7.noarch.rpm
yum localinstall mysql57-community-release-el6-7.noarch.rpm
yum repolist enabled | grep “mysql.*-community.*”
yum install mysql-community-server

It is now fully installed, we will start all services and will confirm the installed versions.

service mysqld restart
mysql –version
service httpd restart
php -v
httpd -v

If you have any question, please add a comment and I will get you back.

How to connect to HugeServer VPN on Linux

To connect to our private network from a Linux client computer, you need to follow the following steps :

  1. Create VPN Password from ION
  2. Download VPN Connection from ION
  3. Install OpenVPN
  4. Connect to VPN Server

Installing OpenVPN Client on Ubuntu / Mint / Debian

Usually, the easiest way to install OpenVPN Client on a Ubuntu / Mint / Debian machine is using APT-GET .

Run the following command on your terminal with root permission :

apt-get install openvpn

Installing OpenVPN Client on Redhat / CentOS  / Fedora

You can simply install OpenVPN Client on your redhat based computer using YUM by running the following command in your terminal with root permission :

yum install openvpn 

Connecting to VPN Server

After installing the client on your machine and having the connection file along your Username and Password you are ready to How to connect to HugeServer VPN on Linuxconnect !

Simply open your terminal window and run the following :

openvpn –config /path/to/folder/client.ovpn

Make sure that you enter the correct file path on the command.

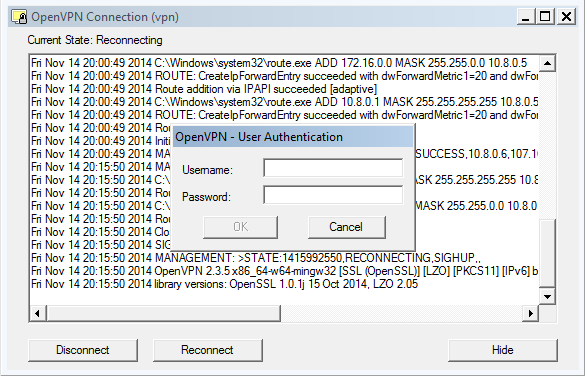
Now it prompts for your Username and Password, after the authentication you should be connected to our VPN network.

If you have any question or trouble connecting to our VPN network don’t hesitate to contact our support department via support@hugeserver.com

CentOS 6 crashed after restarting network

One of our dedicated servers, which is CentOS 6 based crashed today after I wanted to restart the network interface. Simply after running the following command

service network restart

The box has crashed and I had to reboot it. After server comes up, I have checked the logs to see what was wrong on the server. I have found it.

There is a new and current bug which might be solved on CentOS 7, but not yet on CentOS 6. The bug is in “ifdown-eth” script on CentOS which looks like following :

if [ -d "/sys/class/net/${REALDEVICE}" ]; then
 if [ "${REALDEVICE}" = "${DEVICE}" ]; then
 ip addr flush dev ${REALDEVICE} scope global 2>/dev/null
 else
  ip addr flush dev ${REALDEVICE} label ${DEVICE} scope global 2>/dev/null
 fi
[...]

The issue is in the loop-back interface, so we have to change the script to something like following:

if [ -d "/sys/class/net/${REALDEVICE}" ]; then
 if [ "${REALDEVICE}" = "lo" ]; then
  SCOPE="host"
 else
  SCOPE="global"
 fi

 if [ "${REALDEVICE}" = "${DEVICE}" ]; then
  ip addr flush dev ${REALDEVICE} scope ${SCOPE} 2>/dev/null
 else
  ip addr flush dev ${REALDEVICE} label ${DEVICE} scope ${SCOPE} 2>/dev/null
 fi
[...]

After changing the script and restarting the interface, the server was working fine again.

I hope this can help you all, who faces the same issue.

How to speed up yum on centos

Yum is a great tool to install, remove and update packages on centos. As all of you may know yum uses the fastest mirror to download and install the packages on your dedicated server or your desktop computer.

Sometimes it comes to a slow connection between you and the current fastest mirror which is cached on yum, and you are getting a very low download speed for the packages.

To speed up yum, you may reset the yum’s fastest mirror on your dedicated server, and let it choose a new fast mirror to download the packages.

To perform this speed up on your yum, you should run the following command into your ssh/console. This command will remove the cache file of your current fastest mirror, and once you run the yum again, it will choose a new mirror for itself.

rm-f /var/cache/yum/timedhosts.txt

You can now install your packages faster …

yum -y update all
yum -y install PACKAGE_NAME

Thanks!

WinMTR & MTR helping you to trace your network

Are you sometimes having trouble to load your website or access your dedicated server, or are you getting lags using your server SSH or Remote Desktop?

Are you looking for a solution to see packet loss and latency between two networks?

MTR / WinMTR will help you to make your life easier. You can install MTR on any dedicated server or any desktop pcs to track your outgoing network easier.

To install the MTR on Linux based systems, you can use yum or apt-get to get it installed. To install MTR on your windows system, you can download WinMTR from here, and install it on your windows system.

CentOS  :  yum install mtr -y
Ubuntu, Debian : apt-get install mtr -y

The usage of mtr is very easy and simple, you only have to run the following command to see the results.

mtr hugeserver.com

Instead of “hugeserver.com” you can put any other IP addresses or domain names to see the hops and the route your source server to your destination server.

If you want to see only the ip addresses and not the domain information ( rdns ) of them, you can click “n” during the program is running or simply use the following command

mtr -n hugeserver.com

You may change the packet size to something else with adding the package size after hostname or ip address.

mtr -n hugeserver.com 100

This tool can help you to determinate any packet loss between two network.

Thanks