Tag Archives: server management

How Solid State Drives (SSDs) effects your business

As you might know, a website should be fully equipped with many powerful features to turn a visitor into a returning visitor or even a potential customer. It should be user-friendly and offer a good looking interface to visitors. Also recently, being fully responsive for both Mobile and Desktop systems has been turning into a must. However, any of the above will not be taken into account if your website takes a lot of time to load and it will destroy all of your hard work that you have done to create your website.
The studies have shown us that over 60% of people abandon a website after waiting for “3” seconds for that site to load. That clears out the fact that your visitors are not patient, they will abandon your website and get what they want from other websites which they do not need to wait for it to load. So websites performance plays a very important role in getting new visitors and converts them into returning ones. This is where the SSD comes into play.
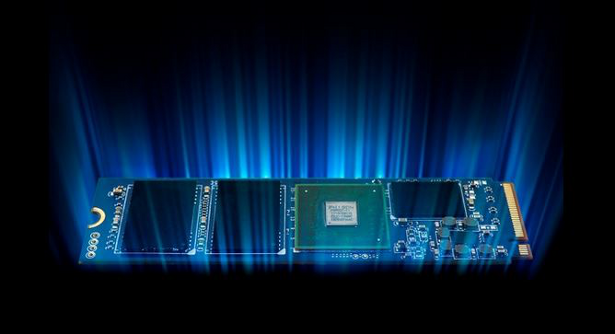
HDDs have been the primary storage for all of the systems for a long time now, As SSDs provides much higher speed compared to HDDs, The IT professionals named it as the “Best Performance Upgrade Ever”.
HDD is a technology that uses the magnetism to store data on a rotating platter. The floating R/W head regularly spin at 10000 RPM to read and write data, this means that the faster the rotating platter spins, the quicker HDD performs. SSDs (Solid State Drives) are not relying on moving parts. Instead, data is stored in Microchips, They are so much faster, more reliable and not depending on mechanical parts to fetch information.

It’s not just the Speed

SSDs are using less power compared to HDDs as they work only on the electronic level and as there are no mechanical parts, SSDs generates less noise.
SSDs access time is about 35-100 microseconds and it’s a ridiculously high performance compared to 5000-10000 microseconds of HDD. This will ultimately allow you to run programs quicker this performance boost will make users load programs from your server quickly.

Conclusion

Nothing can heal the negative impact that left by an unsatisfied visitor who abandoned your website after waiting for it to load.
We at HugeServer Networks, know that customers need powerful resources to deploy their website and web applications to achieve high performance at an efficient cost. SSDs are available for all our services including Dedicated and Virtual servers which ultimately results in more rapid load time and better performance.

Nginx is going to Launch it’s own Application Platform

Nginx is one of the most popular Load balancers, reverse proxies, and, web servers which comes in both Commercial and Open-source forms. and it has recently gone beyond the server roots and launches its own Application Platform.

currently that the way developers writing and deploying of applications is changing very quickly, The company announced at Developer Conference in Portland a couple of days ago, that it’s launching the Nginx Application Platform to give developers a one-stop platform for developing or modernizing their applications with DevOps, the cloud, containers and micro services in mind.

As you might guess the core of the Nginx’s new Platform is Nginx Plus, The commercial version of Nginx that adds a good amount of enterprise features to the open-source version. Plus the company is going to add the Nginx Controller and Nginx Unit which provides a central management and control panel for your Applications.

The development team says that the Controller is a bridge between Nginx Plus and the traditional applications that people run on top of it. Nginx Controller will launch in closed beta in October but Unit is already available.

The existing Nginx Web Application Firewall rounds out the platform. Pricing for the full platform remains untold while Controller is still in closed beta.

It’s also odd because the Nginx Unit is going to be open-source while Nginx Controller is a closed-source project.

How to enable iptables on CentOS 7

Once you install CentOS 7, you will understand there are many differences between CentOS 6 and 7, but however, some technical and people want to use old programs like “iptables” on CentOS 7. One of the programs which are not common on CentOS 7 is “iptables”. CentOS 7 comes with another firewall installed in it called “firewalld” which is known by any customer.

You are able to disable this new firewall and enable old known iptables on CentOS 7 again.  Here I will show you how to do this.

We have to stop and disable firewalld service.

[root@test-lab ~]# systemctl stop firewalld
[root@test-lab ~]# systemctl mask firewalld

Then we should install iptables again on CentOS 7.

yum install -y iptables iptables-services

Once it is done, we have to enable and start it

systemctl enable iptables
systemctl start iptables

Now you are able to use old known iptables on CentOS 7 again, however, firewalld will give you more ability and better firewall options if you want to go professional.

How to install Apache 2.4 on CentOS 6 or 7

Today we are going to install the latest version of Apache “Apache 2.4.23” on a new fresh updated CentOS 7. You can use this tutorial for CentOS 6 as well.

Make sure you have already installed following packages on your server.

yum install gcc
yum install make
yum install openssl-devel
yum install apr-devel
yum install apr-util-devel
yum install wget

Then, we will choose the latest version from Apache website. and download it.

An update: If you are using this article on CentOS 7, the APR version on yum won’t work for you, and you should compile the apr, and apr-util from source, so please remove it from your server if you installed it via yum, and try following:

cd /usr/src
wget http://mirror.lax.hugeserver.com/apache/apr/apr-1.5.2.tar.gz
wget http://mirror.lax.hugeserver.com/apache/apr/apr-util-1.5.4.tar.gz
tar xvfz apr-1.5.2.tar.gz
tar xvfz apr-util-1.5.4.tar.gz

cd apr-1.5.2
./configure --bindir=/usr/bin/
make && make install

cd ../apr-util-1.5.4
./configure --bindir=/usr/bin/ --with-apr=/usr/bin/apr-1-config
make && make install

Now you are able to continue with the rest of guide.

http://httpd.apache.org/download.cgi#apache24

cd /usr/src
wget http://www-eu.apache.org/dist//httpd/httpd-2.4.23.tar.gz
tar xvfz httpd-2.4.23.tar.gz

Now we will start building Apache from source and install it on our server.

cd httpd-2.4.23
./configure --help

We have to know which module of apache we want to install and include them on the ./configure command. It is really easy, as you only need to know the module name and type it with “–enable-(module-name)”. For example, we want to install apache with SSL module, so we will type “–enable-ssl”

By default, Apache will install all its architecture-independent files in  “/usr/local/apache2”. If you want to change this directory we have to set the –prefix option in ./configure . I will use /etc/httpd/ for this option in this tutorial. But, make sure that you are not overwriting your old configuration if you already have installed apache before. I am also using “–sbindir” option to specify the directory where system administrator executables will be installed. Those are server programs like httpd, apachectl, suexec, etc. which are necessary to run the Apache HTTP Server.

mkdir /etc/httpd/

./configure --prefix=/etc/httpd/ --sbindir=/sbin/ --enable-ssl --enable-so
make
make install

Now we are ready to go, we can start Apache server and go ahead with configurations.

apachectl start

That’s it! should you have any question or problem regarding this post please leave a comment below.

How to use IPv6 on Apache?

Nowadays IPv6 is getting more and more common to be used on web servers. It’s better to implement IPv6 on servers in order to be accessible on IPv6 networks.  Here it is a really quick instruction how to get ready for IPv6 on your Apache web servers.

I have installed a fresh CentOS and a fresh apache on my test server, without any control panel. If you are using a control panel or any other operation systems, the way of preparing should be the same, however, if you have any problem during your configuration, you can ask me in the comments.

Let’s start with the apache configuration file. Open “/etc/httpd/conf/httpd.conf” with your text editor in the server. I am using nano.

 nano /etc/httpd/conf/httpd.conf

Now add your IPv6 address to the “listen” options in the file. You should search for “listen” and edit or add the line with your own IPv6. For this tutorial I am using the private prefix “fd13:01ec:a560:534f::/64”

Listen [fd13:01ec:a560:534f::100]:80

Save and exit this file. Now we should change the virtual hosts to add a new IPv6 record into this.  Here is an example of a virtual host with IPv6.

<VirtualHost [fd13:01ec:a560:534f::100]:80 >
ServerName test-lab.hugeserver.com
ServerAlias test-lab.hugeserver.com
ServerAdmin test-lab@hugeserver.com
DocumentRoot /home/test-lab/public_html
<Directory /home/test-lab/public_html>
</Directory>
</VirtualHost>

You should change this configuration in order to be fit into your server configuration. What you actually can do, is copying the VirtualHost configuration of your IPv4 and edit the first line to IPv6. Do not forget to use brackets for your IPv6.

After configurations are done, we are going to restart apache and try to access our web server over IPv6 from Browser.

/etc/init.d/httpd restart

Now it’s accessible from browsers

http://[fd13:01ec:a560:534f::100]/

If you have any problem or question please leave a comment below.

How to connect to HugeServer VPN on Linux

To connect to our private network from a Linux client computer, you need to follow the following steps :

  1. Create VPN Password from ION
  2. Download VPN Connection from ION
  3. Install OpenVPN
  4. Connect to VPN Server

Installing OpenVPN Client on Ubuntu / Mint / Debian

Usually, the easiest way to install OpenVPN Client on a Ubuntu / Mint / Debian machine is using APT-GET .

Run the following command on your terminal with root permission :

apt-get install openvpn

Installing OpenVPN Client on Redhat / CentOS  / Fedora

You can simply install OpenVPN Client on your redhat based computer using YUM by running the following command in your terminal with root permission :

yum install openvpn 

Connecting to VPN Server

After installing the client on your machine and having the connection file along your Username and Password you are ready to How to connect to HugeServer VPN on Linuxconnect !

Simply open your terminal window and run the following :

openvpn –config /path/to/folder/client.ovpn

Make sure that you enter the correct file path on the command.

Now it prompts for your Username and Password, after the authentication you should be connected to our VPN network.

If you have any question or trouble connecting to our VPN network don’t hesitate to contact our support department via support@hugeserver.com

CentOS 6 crashed after restarting network

One of our dedicated servers, which is CentOS 6 based crashed today after I wanted to restart the network interface. Simply after running the following command

service network restart

The box has crashed and I had to reboot it. After server comes up, I have checked the logs to see what was wrong on the server. I have found it.

There is a new and current bug which might be solved on CentOS 7, but not yet on CentOS 6. The bug is in “ifdown-eth” script on CentOS which looks like following :

if [ -d "/sys/class/net/${REALDEVICE}" ]; then
 if [ "${REALDEVICE}" = "${DEVICE}" ]; then
 ip addr flush dev ${REALDEVICE} scope global 2>/dev/null
 else
  ip addr flush dev ${REALDEVICE} label ${DEVICE} scope global 2>/dev/null
 fi
[...]

The issue is in the loop-back interface, so we have to change the script to something like following:

if [ -d "/sys/class/net/${REALDEVICE}" ]; then
 if [ "${REALDEVICE}" = "lo" ]; then
  SCOPE="host"
 else
  SCOPE="global"
 fi

 if [ "${REALDEVICE}" = "${DEVICE}" ]; then
  ip addr flush dev ${REALDEVICE} scope ${SCOPE} 2>/dev/null
 else
  ip addr flush dev ${REALDEVICE} label ${DEVICE} scope ${SCOPE} 2>/dev/null
 fi
[...]

After changing the script and restarting the interface, the server was working fine again.

I hope this can help you all, who faces the same issue.

How to use IPMITool on Linux

You are managing a dedicated server from Internet, and want to access to IPMI? You have colocated a dedicated server in a datacenter and you are looking to have a way to cut off the expensive remote hand fees for reboots, KVM installation, and correction? This can be easily done over IPMI.

But sometimes it is common to happen that your IPMI is not accessible over an Internet interface. This issue may have several reasons. Maybe your IP Configuration is not correct, or maybe the IPMI has crashed, etc.

Here is an easy way to correct such problems on your own dedicated server. At the first we have to install ipmitool on our dedicated box. For installing the ipmitool program you have two way to choose, one is using “yum” on CentOS or “apt-get” on Ubuntu, Debian, and the second way is installing this program from source. I will show you all 3 ways to install IPMITool on our dedicated box.

Installing on CentOS via yum

[root@server ~]: yum install ipmitool -y
[root@server ~]: modprobe ipmi_devintf

Now you can use ipmitool and see/edit the details of your ipmi setting on your dedicated server without having to boot the server into BIOS.

Do you want to see the chassis information of your server, then you have to use following command.

ipmitool chassis status

You can also see the power information of your server, by using the following command.  Instead of status at the end of the command  you can use “cycle” to power cycle the chassis, “on” to power on the chassis, “off” to power off your server and …

ipmitool chassis power status

You can also see and edit the network configuration of your chassis via ipmitoo. For reviewing the Network Configuration you should use following command, as output you will see a list of information, the important details for you might be the “IP Address” section, which shows your current public or private ip address of ipmi.

ipmitool lan print

If you have troubles with your current IP addresses and want to change the IP address to another one, you can perform following command

 ipmitool lan set 1 ipaddr  IPADDRESS
ipmitool lan set 1 netmask  NETMASK
ipmitool lan set 1 defgw ipaddr  GATEWAY

Sometimes you will see that your ipmi console is not working, or your web interface is not loading for you. The best and simplest way you can solve such issues, is resetting the bmc of IPMI. For performing this you should run the following command. This command won’t reboot your dedicated server, and will only reset the bmc of ipmi.

ipmitool chassis power reset cold

You want to see how hot your server currently is? No problem it is simple with IPMITool. You can use following command to see the temperature of your server/cpu and chassis.

ipmitool sensor | grep “Temp”

There are a lot more to use with this helpful command, if you have any question regarding this software, please leave a Comment for me and I will get back to you with a solution.

I hope this article helps you.

IPMI Integration!

Hi everyone,

We’re delighted to announce the latest update of our ubersmith and new features!

last week we were working hard to make sure that all the Supermicro servers are ready to be integrated to our customer panel,now our customers are able to gain access to the KVM Console,SOL Console,Server Temperature,Fans Status,Voltage,etc!

before this event you had to reboot your server in a hard way – that could damage your server sometimes but at the moment the panel find the safest way to rebooting your server.if the server have IPMI (all the new servers have) it will post the reboot request to IPMI instead of power distribution unit (PDU) actually it do a soft reboot.

How to access this ?

just login in into your customer panel and go to “Device Manager” -> “View Devices” then you see your devices list.choose one and then you’re able to manage your server easily(“IP assignments,Bandwidth monitoring,Device information,Monitoring sensors,IPMI information and Reboot control!”).

Feel free to contact our support department if you have any trouble using IPMI or questions regarding using it.

Also it’s good to know the upcoming features,we’re working on RDNS control and a White-label panel for resellers!

You may subscribe to our blog or follow us at Twitter,Facebook or Google+ to keep updated about the company news.