HugeServer Blog

Updates and News about HugeServer !

How to use IPv6 on Apache?

Nowadays IPv6 is getting more and more common to be used on web servers. It’s better to implement IPv6 on servers in order to be accessible on IPv6 networks.  Here it is a really quick instruction how to get ready for IPv6 on your Apache web servers.

I have installed a fresh CentOS and a fresh apache on my test server, without any control panel. If you are using a control panel or any other operation systems, the way of preparing should be the same, however, if you have any problem during your configuration, you can ask me in the comments.

Let’s start with the apache configuration file. Open “/etc/httpd/conf/httpd.conf” with your text editor in the server. I am using nano.

 nano /etc/httpd/conf/httpd.conf

Now add your IPv6 address to the “listen” options in the file. You should search for “listen” and edit or add the line with your own IPv6. For this tutorial I am using the private prefix “fd13:01ec:a560:534f::/64”

Listen [fd13:01ec:a560:534f::100]:80

Save and exit this file. Now we should change the virtual hosts to add a new IPv6 record into this.  Here is an example of a virtual host with IPv6.

<VirtualHost [fd13:01ec:a560:534f::100]:80 >
ServerName test-lab.hugeserver.com
ServerAlias test-lab.hugeserver.com
ServerAdmin test-lab@hugeserver.com
DocumentRoot /home/test-lab/public_html
<Directory /home/test-lab/public_html>
</Directory>
</VirtualHost>

You should change this configuration in order to be fit into your server configuration. What you actually can do, is copying the VirtualHost configuration of your IPv4 and edit the first line to IPv6. Do not forget to use brackets for your IPv6.

After configurations are done, we are going to restart apache and try to access our web server over IPv6 from Browser.

/etc/init.d/httpd restart

Now it’s accessible from browsers

http://[fd13:01ec:a560:534f::100]/

If you have any problem or question please leave a comment below.

HugeServer expands to the Netherlands

We are happy to announce our new facility in Meppel, Netherlands. It’s our first expansion to Europe and we will offer all our services in our Netherlands datacenter.

We expanded to Netherlands because it’s one of the best-connected countries in Europe. Netherlands is the perfect location for whom demand no-compromise low-latency access to markets across the EU including the Netherlands, France, Germany, and Scandinavia, as well as adjacent nations.

HugeServer’s network in Netherlands is directly connected to AMS IX (+800 members) and DE-CIX (750 members).

More information about the datacenter and network can be found here.

For more concerns regarding our new facility please send an email to sales@hugeserver.com or call 888-842-8570

How to Install Apache 2.2, PHP 5.6, MySQL 5.7 on CentOS 6

Today I am going to teach you the easiest way of installing a Webserver with Apache, PHP, and MySQL.

We are going to use Epel and Remi repositories on CentOS and configure our server. First of all, we should find the latest version of Epel and Remi packages from their sites :

http://dl.fedoraproject.org/pub/epel/6/x86_64/
http://rpms.famillecollet.com/enterprise/

After it, we will download the packages on our system and install them on the server.

wget http://dl.fedoraproject.org/pub/epel/6/x86_64/epel-release-6-8.noarch.rpm
wget http://rpms.famillecollet.com/enterprise/remi-release-6.rpm
rpm -Uvh remi-release-6.rpm epel-release-6-8.noarch.rpm

After these packages are installed completely, we should activate these repositories on Yum configuration file.

nano /etc/yum.repos.d/remi.repo

Make sure that “[remi]” and “[remi-php56]” are enabled. It should look like as following.

[remi]
name=Remi’s RPM repository for Enterprise Linux 6 – $basearch
#baseurl=http://rpms.remirepo.net/enterprise/6/remi/$basearch/
mirrorlist=http://rpms.remirepo.net/enterprise/6/remi/mirror
enabled=1
gpgcheck=1
gpgkey=file:///etc/pki/rpm-gpg/RPM-GPG-KEY-remi

[remi-php56]
name=Remi’s PHP 5.6 RPM repository for Enterprise Linux 6 – $basearch
#baseurl=http://rpms.remirepo.net/enterprise/6/php56/$basearch/
mirrorlist=http://rpms.remirepo.net/enterprise/6/php56/mirror
# NOTICE: common dependencies are in “remi-safe”
enabled=1
gpgcheck=1
gpgkey=file:///etc/pki/rpm-gpg/RPM-GPG-KEY-remi

We have to save the file and then edit the Epel repository to make sure it is enabled too.

nano /etc/yum.repos.d/epel.repo

It should be enabled as following :

[epel]
name=Extra Packages for Enterprise Linux 6 – $basearch
#baseurl=http://download.fedoraproject.org/pub/epel/6/$basearch
mirrorlist=https://mirrors.fedoraproject.org/metalink?repo=epel-6&arch=$basearch
failovermethod=priority
enabled=1
gpgcheck=1
gpgkey=file:///etc/pki/rpm-gpg/RPM-GPG-KEY-EPEL-6

Now we can start to install PHP, apache on our system.

yum clean all
yum update
yum install php php-mysql

After all these steps are done, we will install MySQL on our system.

wget http://dev.mysql.com/get/mysql57-community-release-el6-7.noarch.rpm
yum localinstall mysql57-community-release-el6-7.noarch.rpm
yum repolist enabled | grep “mysql.*-community.*”
yum install mysql-community-server

It is now fully installed, we will start all services and will confirm the installed versions.

service mysqld restart
mysql –version
service httpd restart
php -v
httpd -v

If you have any question, please add a comment and I will get you back.

HugeServer Announces Logo and Website Redesign

We are glad to announce our new logo and website redesign inspired by following factors:

  • Impressing current and new customers
  • Creating a more trusting and supportive energy through the new look
  • Staying up-to-date with current digital trends
  • Attracting new customers

I believe the new Logo design was a necessary step for us to take the feeling and company image to the next level. At the same time, we redesigned the entire website and introduced new products and services such as Hybrid and Virtual Servers. I appreciate everyone in the development department whom helped to make this long process happen.  Looking forward to 2017, HugeServer plans to expand geographically and improve its automation systems with focus on user control and service provisioning.


HugeServer WHMCS Module for Resellers Released.

We’re proud to say our module for WHMCS v6 is released on Github.  The module mostly is designed for resellers with WHMCS as their billing system so they can provide their customers control over their servers.

  • Get Server Specification
  • VPN Access for Clients
  • Bandwidth Graph
  • Bandwidth Statics
  • rDNS Control
  • IPMI Console (requires VPN connection)
  • IP Address lists
  • Power Control

The module has functions on both Admin and Client portal. Documentation and Installation guide can be found on Github.

https://github.com/HugeServer/ION-Reseller-WHMCS-Module

If you have any question regarding the module or trouble installing it  don’t hesitate to contact us at support@hugeserver.com.

Thank you.

ION v1.2 Released!

We are very pleased to announce that the new version of our Control panel, ION. This version includes new features, bug fixes and RESTful API!

Highlights of ION v1.2:
  • Hybrid Server Support
  • Virtual Server Support
  • Automatic Null Route
  • Reseller white label control panel UI Improvement
  • RESTful API v2
Demo of ION:

https://ion.hugeserver.com/
username: demo
password: demo

Demo of Reseller white label panel:

http://reseller-demo.hugeserver.com/
demo@democompany.com

If you have any question regarding ION v1.2 or have a feature request don’t hesitate to comment below or contact support@hugeserver.com

Also, if you would like to be one of our successful resellers please contact us on LiveChat or sales@hugeserver.com

Thank you,
Saman Soltani

HugeServer 2014 Review

2014 was a big year for HugeServer and majority of what we had planned last year is achieved by now and we will assure you that every year that passes by we get where no one expects us to be!

  • Expansion to 3rd Los Angeles Datacenter: opening our 3rd datacenter has been the best goal we achieved in the year. Now we’re able to provision more servers in a quick time backed by our big inventory.
  • Optimizing network for Asia: we value all customer and always try to provide the best service to them. with growing service demand from Asia we decided to optimize our network for the least latency to Asia pacific.
  • Full Juniper Network: upgrading our whole network router and switches to Juniper equipment. this upgrade will improve network uptime and reliability our customers.
  • ION: our full- featured brand-new control panel for managing your server and infrastructure easily. we will continue to develop the control panel for more automation tasks.
  • ION API: ION API is here for developers who wants to access ION features in their application.
  • ION Reseller Control Panel: one month after launching ION we launched our new white-label control panel for our resellers.  Now they have more flexibility to control their branding and access lists through their reseller control panel.
  • NOC Improvement: our NOC department has now more monitoring tools to prevent and detect any network outage and attacks in a short time.
  • Full-time Development Team: we hired a team of professional full-time developers and we look forward developing new stuffs for our customers.

We always look forward to improve our service and quality in any term and have some big announcements for 2015, which we cannot wait sharing them with you!

Thank you.

How to connect to HugeServer VPN on Linux

To connect to our private network from a Linux client computer, you need to follow the following steps :

  1. Create VPN Password from ION
  2. Download VPN Connection from ION
  3. Install OpenVPN
  4. Connect to VPN Server

Installing OpenVPN Client on Ubuntu / Mint / Debian

Usually, the easiest way to install OpenVPN Client on a Ubuntu / Mint / Debian machine is using APT-GET .

Run the following command on your terminal with root permission :

apt-get install openvpn

Installing OpenVPN Client on Redhat / CentOS  / Fedora

You can simply install OpenVPN Client on your redhat based computer using YUM by running the following command in your terminal with root permission :

yum install openvpn 

Connecting to VPN Server

After installing the client on your machine and having the connection file along your Username and Password you are ready to How to connect to HugeServer VPN on Linuxconnect !

Simply open your terminal window and run the following :

openvpn –config /path/to/folder/client.ovpn

Make sure that you enter the correct file path on the command.

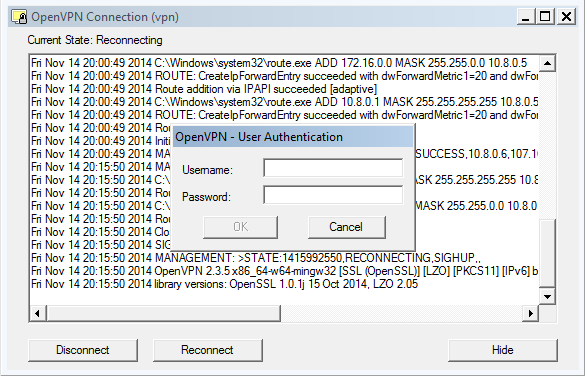
Now it prompts for your Username and Password, after the authentication you should be connected to our VPN network.

If you have any question or trouble connecting to our VPN network don’t hesitate to contact our support department via support@hugeserver.com